Remember to save the link to this guide in case you forgot to download it.
Thank you for purchasing this guide! You’ve taken the first step toward launching your channel and creating captivating faceless videos. This guide will teach you how to start a faceless channel, provide content ideas, introduce you to three powerful free tools, and offer a step-by-step walkthrough on how to use them to create engaging videos for your channel.
Without further ado, let’s dive in:
How to Launch a Faceless Social Media Channel
Starting a faceless social media channel is a great way to build an online presence while maintaining your privacy. Here’s how you can get started:
- Choose a Niche: Focus on a specific topic or interest, such as tech reviews, motivational quotes, life hacks, or storytelling. A clear niche helps attract a targeted audience.
- Create a Brand Identity: Develop a unique logo, name, and theme for your channel to make it recognizable. Use consistent colors, fonts, and visuals. Simply use free Canva for this.
- Plan Content: Decide on the type of content you’ll share—videos, infographics, animations, or voiceovers. Tools like Canva or Adobe Spark can help create visually appealing posts.
- Leverage Tools: Use text-to-speech & text-to-image softwares, stock footage, and royalty-free music (Use YouTube Library) to create engaging content without showing your face.
Personally, I recommend focusing on the niche of motivational and inspirational stories. This niche remains evergreen, as the same story can be told from a different perspective and still attract millions of views and likes.
How to Create an Engaging Story and Generate a Voiceover for It
– Crafting an engaging story and generating a voiceover for it doesn’t have to be difficult. If you’re skilled at storytelling, you can create one on your own (best option). If you don’t have a story idea and need inspiration, you can turn to ChatGPT or explore the internet. For example, use the following prompt to ask ChatGPT to create a script:
Prompt: “Write a short speech on the theme ‘Move in silence—let your success speak louder than words.'”
ChatGPT will generate a well-crafted script that you can then convert into a voiceover using a Text-to-Speech tool.
If you’re looking for sample stories, especially in the inspirational niche, you’ll find plenty of examples on various websites. Here are some platforms where you can explore them:
- Sun In Me: https://suninme.org/true-story
- Pinterest: https://in.pinterest.com/raorachanas/inspirational-short-stories/
– Feel free to explore stories within your chosen niche or delve into tales from any other niche that piques your interest.
– Once you’ve identified your story from the web, customize it to fit your needs, then simply bring it to ChatGPT and let the magic happen!
– Here’s a trick many people don’t know: you can copy a story from any website and ask ChatGPT to edit it, transforming it into original content by changing character names, scenes, and other details. Alternatively, you can ask ChatGPT to write a similar story inspired by the one you’ve copied from the website.
– Here’s a prompt you can use to guide ChatGPT in rewriting the story according to your needs:
Prompt:
“I have a story that I want you to rewrite. The original story features [brief description of the original story, e.g., “a group of friends on an adventurous treasure hunt”]. I need you to rewrite it by:
- Changing the characters to [describe the desired characters, e.g., “a team of young entrepreneurs working on a tech startup”].
- Altering the scenes to [describe the desired settings, e.g., “modern office spaces, bustling cityscapes, and virtual meetings”].
- Adjusting the tone to suit a [describe the target niche, e.g., “motivational and inspirational audience”].
- Ensuring the plot aligns with the interests of the [specific audience, e.g., “aspiring entrepreneurs who are looking for inspiration to overcome challenges”]. Please maintain the core essence of the story while adapting it to this new framework. Make it engaging and relatable to the target audience.”
– After receiving your final draft from ChatGPT, it’s time to move on to generating a voiceover for it. The voiceover generator you’ll learn about next can create voiceovers for stories up to 10 minutes in length. This makes it ideal for producing voiceovers for both captivating long-form stories and concise short-form content.
– Here’s a link to an example of a simple video I created using the method above (copying from website + rewriting with ChatGPT), which garnered a lot of views and likes across all social media platforms, even though the channel had fewer than 100 subscribers at the time.
Free Tool #1: ClipChamp - Voiceover Generator
What is Clipchamp?
Clipchamp is a free or freemium online tool that offers robust text-to-speech features. In this guide you’ll learn how to use Clipchamp free version to create diverse voiceovers of up to 10 minutes and export them as MP4 files for use in other video editing software.
Clipchamp provides users with a variety of tools, including:
- Leveraging text-to-speech captioning and voiceover tools.
- Combining video, image, and audio files into polished content.
Adding visual effects like text overlays, transitions, and filters.
Creating quick, template-based videos optimized for social media.
NOTE: You can use Clipchamp to create complete videos by combining generated images, voiceovers, and visual effects such as text overlays, transitions, and filters. However, this guide specifically focuses on Clipchamp’s text-to-speech and voiceover features, which are available for free without the need for an upgrade.
Getting Started with Clipchamp
To begin using Clipchamp’s free text-to-speech generator:
Click the link below to create an account using your email:
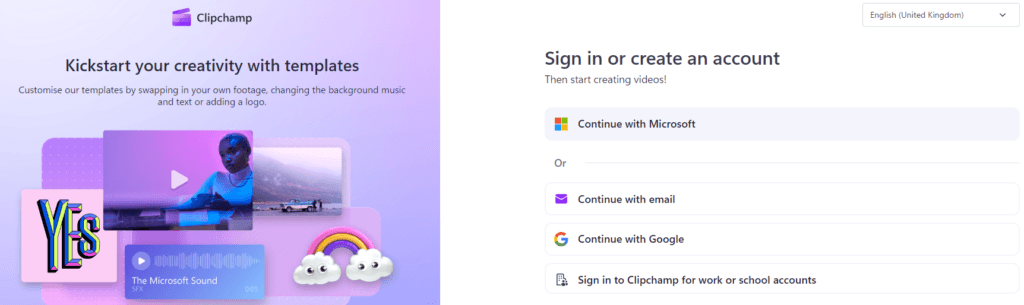
Upon logging in, you will be directed to the Clipchamp dashboard, as shown in the video below. Here, you can explore Clipchamp’s free text-to-speech features.
Now that you’ve created an account and logged in, watch the video tutorial below to learn how to create your voiceover for free.
In this tutorial, I will use a paragraph I prepared for a text-to-speech video ad. However, you can use the content of the story you generated with ChatGPT above.
Your generated voiceover is now ready for use in any editing software, perfect for creating viral videos for social media or marketing campaigns.
Note:
Clipchamp can generate voiceovers of up to 10 minutes.
- While Clipchamp allows you to create and edit videos, it lacks some advanced features found in tools like CapCut or Premiere Pro. As a result, many users prefer exporting their voiceovers and utilizing them in other editing platforms.
Now that you’ve found the perfect voiceover tool, let’s move on to exploring a free image generator.
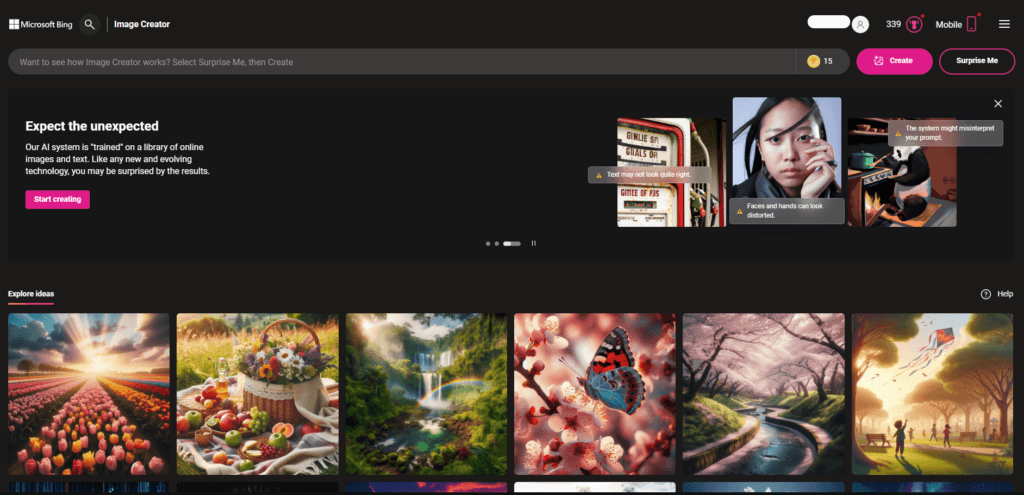
Free Tool #2: Microsoft Bing Image Creator
Microsoft Bing Image Creator is a free AI image generator that uses DALL-E 3 to create digital images from text descriptions.
How it works
You can use Bing Image Creator to create images by:
- Going to bing.com/create and logging in with a Microsoft account.
- Entering a description of the image you want to create.
- Clicking Create.
- Viewing and downloading your results.
Examples of ChatGPT prompts you can use to generate ultra-realistic images:
“A futuristic cityscape at dusk, with towering skyscrapers made of glass and neon lights, reflecting the colors of a vibrant sunset in the sky. Flying cars zoom through the streets, while people in sleek, high-tech clothing walk on suspended walkways above the city. The scene should have a cyberpunk aesthetic with a focus on glowing lights and a bustling atmosphere.”
“A tranquil forest glade with soft sunlight filtering through tall, ancient trees. A crystal-clear stream flows through the center, surrounded by lush greenery and colorful wildflowers. In the distance, a small wooden cabin with a stone chimney sits near the water, creating a peaceful, idyllic atmosphere.”
“A medieval knight in shining armor, standing proudly on a hilltop overlooking a vast battlefield. The knight holds a sword in one hand and a shield in the other, with a dramatic sky of dark clouds and lightning in the background. The scene should evoke a sense of valor and anticipation before a great battle.”
“A surreal underwater scene with glowing jellyfish floating in the dark depths of the ocean. Strange, colorful coral formations and schools of fish swirl around, while a massive ancient shipwreck lies partially buried in the sand. The atmosphere should feel mysterious and otherworldly, with bioluminescent creatures lighting up the surroundings.”
“A cozy, rustic kitchen with a wooden table set for a family dinner. The room is warmly lit with a crackling fire in the fireplace, and the walls are lined with shelves of homemade preserves and kitchenware. The scene should evoke a sense of comfort and homeliness, with soft lighting and a welcoming atmosphere.”
An Example of an Anime Character Image Prompt and the Resulting Images Generated by Bing Create.
“A dynamic anime character standing in a vibrant, futuristic cityscape at sunset. The character is a young adult with spiky silver hair, glowing blue eyes, and a confident smirk. They wear a sleek, cyberpunk-style outfit with a black jacket adorned with neon-blue accents, fingerless gloves, and utility belts. In one hand, they hold a high-tech katana with a glowing blade, while the other hand is raised, generating a small sphere of electric energy. The background features towering skyscrapers with holographic advertisements, flying vehicles, and a glowing skyline blending shades of orange, pink, and purple. The overall atmosphere is energetic and slightly mysterious, with the character exuding a sense of determination and power.”
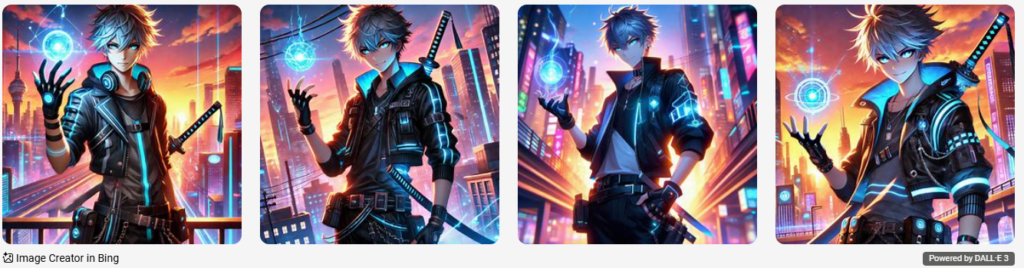
Amazing right?👍 Feel free to adjust the above prompts to suit your preferences. The clearer and more detailed the description, the better the results.
To begin using Bing Image Creator:
Click the link below to create an account using your email:
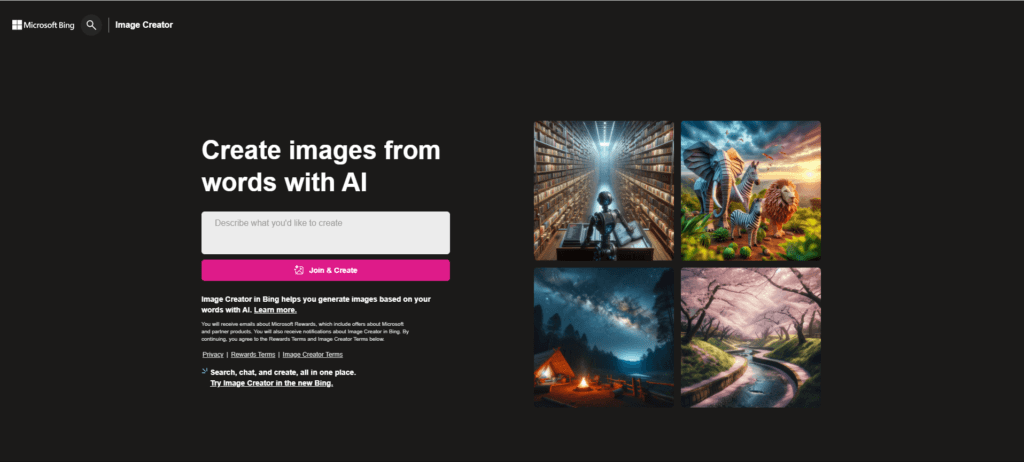
Upon logging in, you will be taken to Being Image Creator dashboard as shown below:
Now Watch the video tutorial below to learn how to generate your Images for free..
Your generated images are now ready to be used in any Video editing software, perfect for creating viral videos for social media or marketing campaigns. Here’s a link to a simple video I created using images from Bing Create: https://youtube.com/shorts/2rZ1EP1s7LM?si=RHM1UP30PdNIxyCR
Note: Bing Create will keep generating ultra-realistic images even after your credits run out. While the process may slow down slightly, it will still function effectively. This is just one more reason I appreciate this tool, as such a feature is rarely found in other tools.
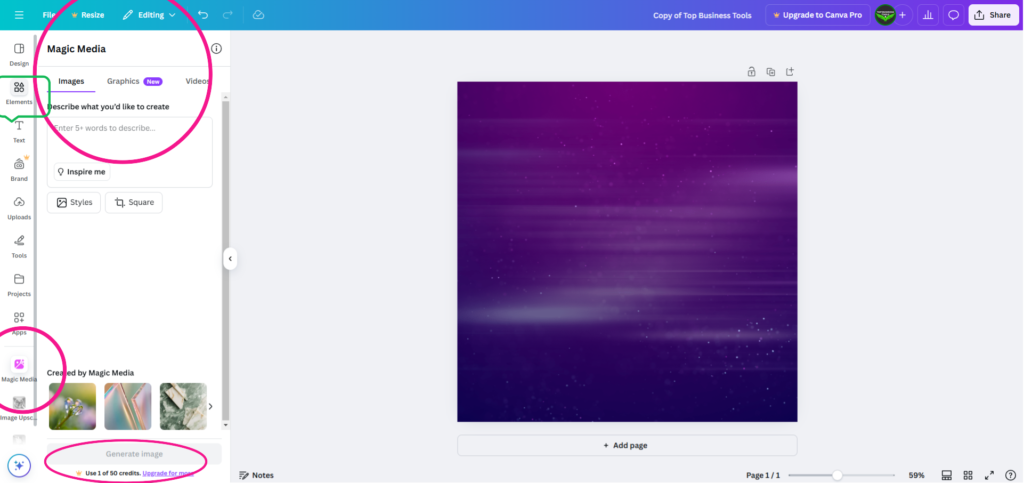
Creating Images and Videos with Canva
You can also find images and videos for your content on Canva by simply logging into your Canva account. Under the “Elements” tab, you can search for your preferred image or video. However, keep in mind that most of the high-quality images and videos are available only with a Canva Pro subscription and are not free.
Additionally, you can generate images using Canva Magic Media, as shown below. The free version of Canva provides 50 credits, while Canva Pro offers 500 credits. However, unlike Bing Create, which allows you to generate images even after your credits are exhausted, Canva does not offer this option. Also, note that the image quality produced by Bing Create is significantly higher and more realistic than the images generated by Canva Magic Media.
Now that you’ve discovered the perfect free tools for generating voiceovers and images, it’s time to bring them together. Using a third tool, we’ll combine your visuals and audio to create an engaging video for your faceless channel just like the ones you’ve watched above.
Free Tool #3: CapCut
CapCut is a Free, user-friendly video editing app developed by ByteDance, the creators of TikTok. It offers a wide range of features, making it a popular choice for creating professional-quality videos.
Key Features of CapCut:
- Intuitive Editing Tools: Trim, split, merge, and adjust video clips with ease.
- Special Effects: Add filters, transitions, and effects to enhance your videos.
- Text and Stickers: Insert text overlays, subtitles, and fun stickers to make your videos engaging.
- Music and Sound Effects: Access a library of royalty-free music and sound effects to complement your content.
- Advanced Features: Includes options like keyframe animation, green screen editing, and speed adjustments.
- Optimized for Social Media: Perfect for creating content tailored to platforms like TikTok, Instagram, and YouTube.
CapCut is widely used by creators for its simplicity and versatility, making it an excellent choice for both beginners and experienced editors.
To start using CapCut, click the link below to download it for free.
The Uptodown version of CapCut is completely free and includes all features without requiring an upgrade. Avoid upgrading when prompted, as the latest version has removed many free features.
To comfortably run CapCut on a computer, your system should meet the following specifications:
- Operating System: Windows 10/11 (64-bit) or macOS 11 and above.
- Processor: Intel Core i5 or higher, or AMD Ryzen 5 or better.
- RAM: 8GB or more.
- Graphics: Dedicated GPU (NVIDIA GeForce GTX 1050 or AMD Radeon RX 560).
- Storage: SSD with at least 5GB of free space.
- Display Resolution: Full HD (1920 x 1080) or higher.
To verify your computer’s specifications, follow the process outlined below:
For Windows:
Using System Information:
- Press
Windows + Rto open the Run dialog box. - Type
msinfo32and press Enter. - The System Information window will display detailed specifications, including the processor, RAM, system type, and more.
- Press
Checking GPU (Graphics Card):
- Right-click on the desktop and select Display settings.
- Scroll down and click Advanced display settings.
- Select Display adapter properties to see your GPU details.
For Mac:
Using About This Mac:
- Click the Apple menu () in the top-left corner of the screen.
- Select About This Mac.
- A window will open showing details like macOS version, processor, memory, and graphics.
Now that you’ve learned the basics, watch the video tutorial below to see how to create an engaging video using CapCut.
I’ll use the voiceover I created earlier with ClipChamp for the Text-to-Speech Tools, along with images generated using free Canva. However, you can use the images you created with Bing Create, depending on your story. The process is the same, and both options work equally well.
And that’s how you can combine your voiceover and images to create an engaging video. Always remember to incorporate transitions between your images. If the story is compelling, it will attract views and likes. To enhance your videos further, explore more tricks in CapCut to add extra flair. However, keep in mind that the story is what truly matters. People are drawn to an interesting story, whether or not it includes advanced video effects.
For now, these tips are sufficient to help you start creating an engaging story with CapCut. As you become more experienced with the app, you can begin incorporating keyframes into your videos to add motion graphics, parallax effects, transitions, sounds, and more. Here’s a link to a simple video I created using these tools by combining images and a voiceover with CapCut. You can do it too!
Video Link: https://youtube.com/shorts/KO2gzFgpkgM?si=XOj4g7daga-Ywoaq
Now that you have your video, you can share it across all social media platforms. To boost your chances of creating viral content and accelerating your channel’s growth, aim to post consistently—about three videos per week.
Conclusion and Strategies for Rapid Channel Growth
In conclusion, this is how you can create faceless videos using these three tools. Be sure to explore each tool further to discover all of its features. The best way to master them is through practice—create as many videos as you can since these tools are free. The more videos you make, the better you’ll get, and the faster your channels will grow.
For every video you produce, make sure to post it across all your channels. A video may perform exceptionally well on one platform but receive fewer views on another. Don’t be misled by profiles that showcase many viral videos; it’s likely the channel owner has deleted underperforming content to create the illusion of a highly successful channel. Therefore, aim to produce as many videos as possible and apply the same strategy across all platforms. A good starting point is to publish three videos a week.
Note: This guide is intended for personal use only. Any resale, sharing, or unauthorized distribution of its contents is strictly prohibited. Legal action will be taken against anyone who violates these terms.