Are you ready to build your first website in just two steps? Hostinger website builder makes it easy, even if you have no prior experience. This guide will take you step by step through the process of creating a professional website from scratch and show you how to instantly enjoy a 20% discount from Top Business Tools.
Table of Contents
1. Sign up for Hostinger
The first step is to sign up for Hostinger. Visit the Hostinger website builder to get started and enjoy a 20% discount today!
Next, choose a Plan:
- Business Plan: Best for performance and e-commerce features. (Recommended)
- Premium Plan: An affordable option for simpler websites, especially if you’re on a tight budget.
Hostinger offers a 30-day money-back guarantee, meaning it’s risk-free.
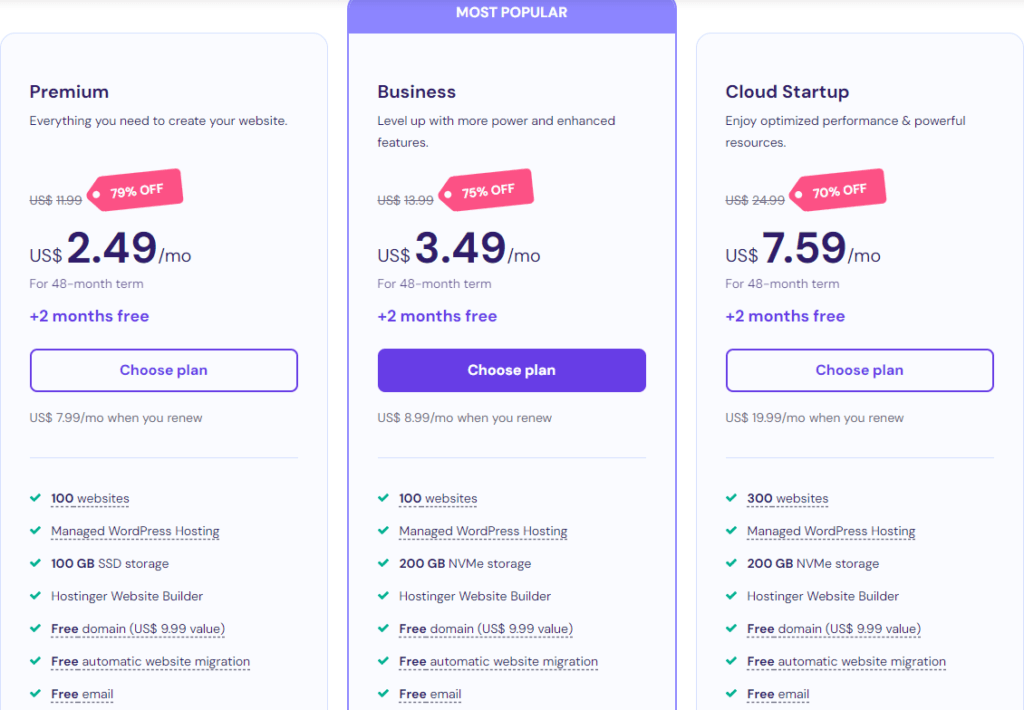
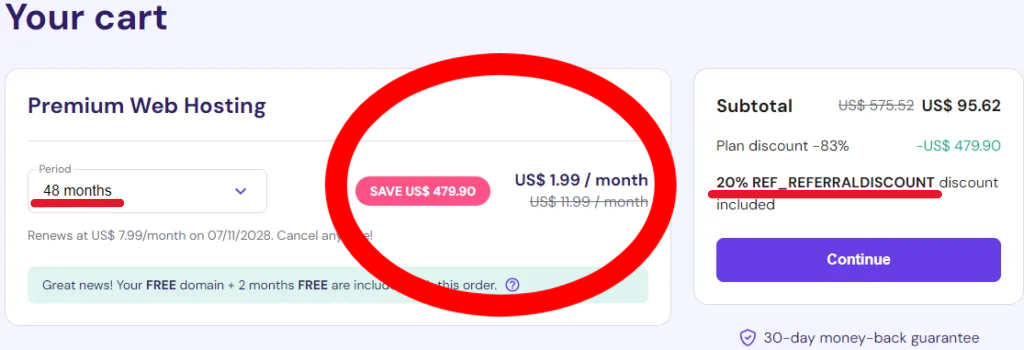
Enjoy an even greater discount when you choose the 48-month plan. See Below:
After signing up, you’ll go through an onboarding process.

On the second page, click Create a Website to start fresh.

Setting Up Your Website
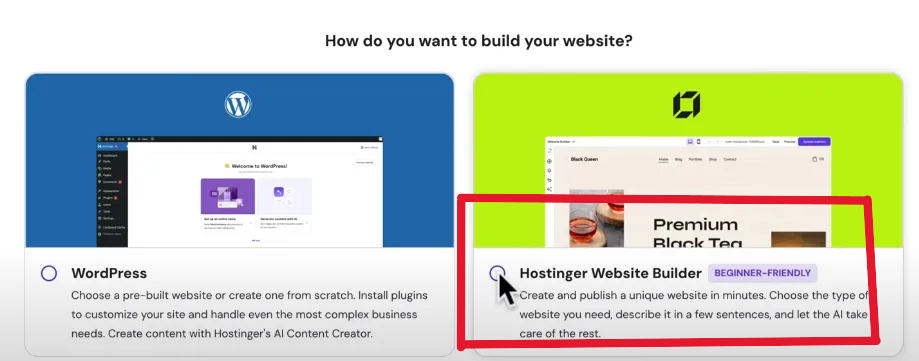
On the third page, you’ll select the Hostinger Website Builder.
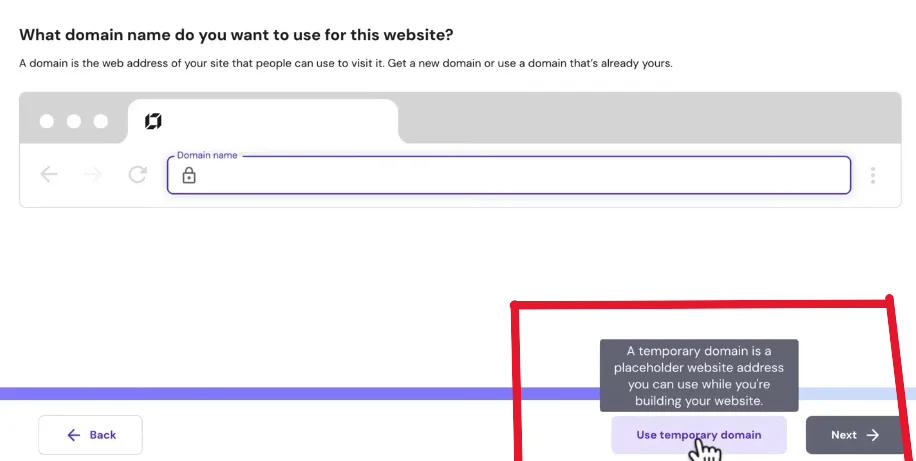
When prompted, you can choose a domain name, but it’s often easier to build your website first and connect the domain afterward. In this guide, you will learn how to connect your domain later. For now, click on Use Temporary Domain.
2. Building Your Website
Now it’s time to build your website. Follow these steps:
- Select the Type of Website: Choose what kind of website you want to create. e.g. Business Websites, E-Commerce, Blog, Portfolio Websites, News and Magazine, Educational Websites, Entertainment, Social Media, Forum and Community, Government and Non-Profit, Personal Websites, SaaS (Software as a Service) Websites.
- Enter Your Brand Name: Input your brand name.
- Description: Describe the purpose and style of your website. Be specific and use a prompt like the one below for a website about surfing photography. Adjust the prompt to suit the needs of your website.
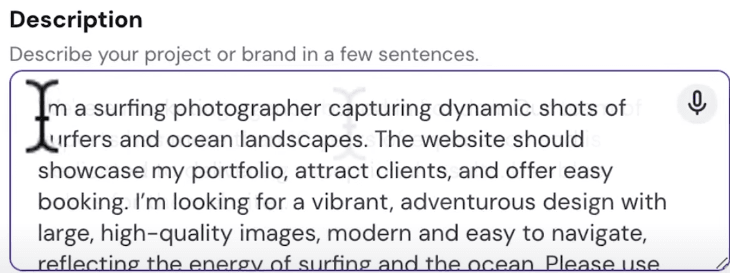

4. Under Personalisation settings, include specific fonts and brand colors if you have them in mind.
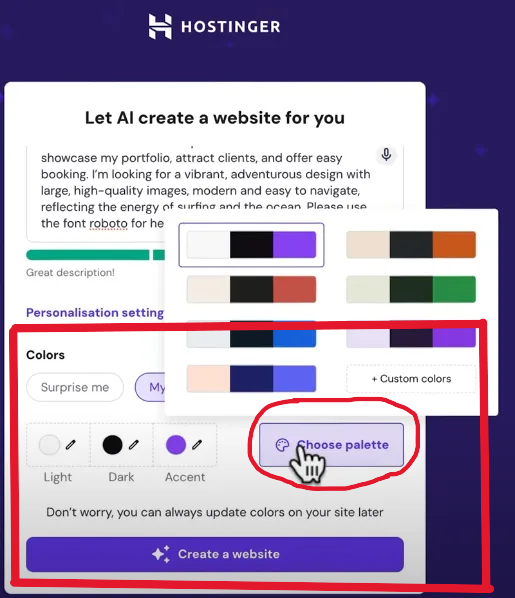
Once you’ve filled out these details, click Create a Website.Hostinger’s AI will generate a draft similar to the one below based on your inputs.

Connecting Your Domain
Once the draft is created, you can preview it. If you’re satisfied, connect your domain and publish your website as shown below:
Click on Connect Domain, type in your desired domain name, and follow prompts to register it. See image below:
Keep the domain short, easy to remember, and choose .com, as it is the most trusted and recommended domain. Your new domain will be automatically connected to your website.
To make your website live, click Go Live at the top right corner.

Voila! Your website is now ready

Additional customization if needed
However, if you need to further customize your website like editing texts, images, mobile optimization, adding a blog or ecommerce store, seo settings.., just follow the simple steps below, which includes clear image descriptions.
1. Customizing Your Website
If you find elements you like in the website, great! If not, go back to the AI form or click edit site, adjust your text prompt, and regenerate.

Click on Edit Site at the top right corner to begin customizing.
Editing Text and Images
- To Edit Text: Click the text you want to change, then click Edit Text to make your adjustments. See below:
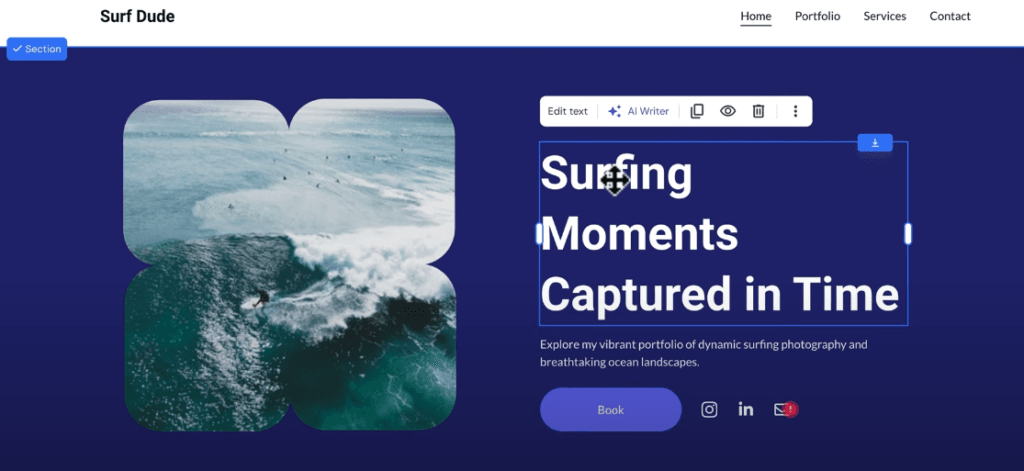
- To Edit Button: Click the button you want to change, then click Button Settings to make your adjustments
- You can also add a call-to-action (CTA) link to your button.

- To Change Images: Select the image, click Edit Image, and upload your new picture.
- To Move Elements: Click, hold, and drag any element to the desired location. See below:

Adding New Elements
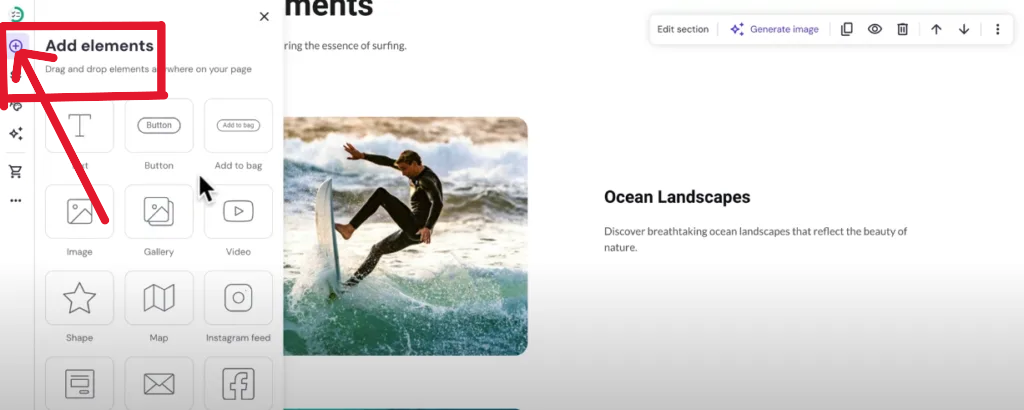
To add elements:
- Click the plus icon on the left side.
- Drag the desired element, like a button, onto your page.
Managing Sections
To add a new section below an existing one:
- Hover over the section below where you want the new one.
- Click Add Section and choose a template. See below:


You can also delete elements by selecting them and clicking the trash icon 🗑️
You can always undo an action if you make a mistake. See below:

2. Mobile Optimization
Always check how your website looks on mobile devices. Click the mobile icon and make sure everything aligns correctly. Adjust any misaligned elements as needed by simply dragging and dropping them.
Kindly note adjustments made in the mobile view won’t affect the desktop view.

You can hide a section in the mobile view by clicking the eye icon and disabling the mobile view.

3. Pages and Navigation
To edit other pages like Portfolio, Services, Contact, simply click on them in the navigation menu. Follow the same procedure as above to edit text, images, and buttons on the pages.

To add a new page, click on Pages and Navigation, then Add Page. You can start fresh or use a template. The new page will be automatically added to your navigation menu.
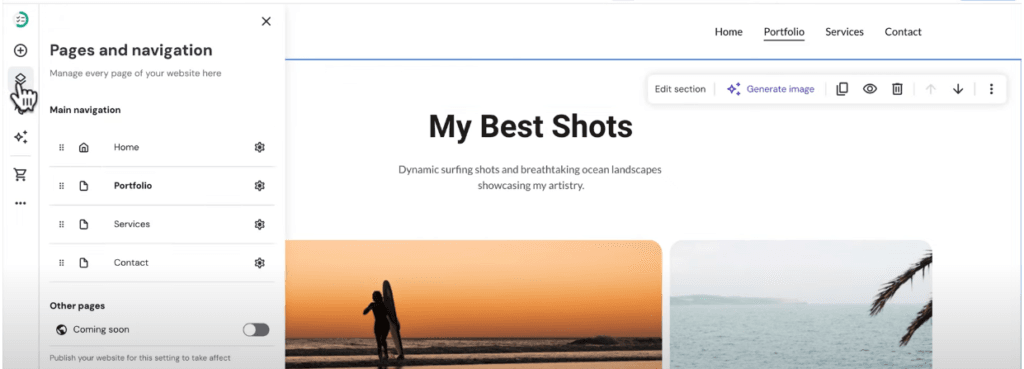
You can rearrange the pages by just holding and dragging as shown below:

4. Customizing Header and Footer
To edit the Header:
- Click on the header and select Edit Header. See below:

- Change layout and elements, and upload your logo. You can also change the header background color under the “Style” section.

Editing the Footer is just as easy. Select it and make your changes.
You can also hide the footer on any page by going to that page, selecting it, then navigating to the footer and clicking the eye icon to hide it.

5. Design Consistency
To maintain consistency, check your website’s styles:
- Colors: You can change existing colors through the Website Styles menu shown below.
- Fonts: Be cautious when changing fonts, as they may affect alignment.


Adding Features Like a Contact Form
To set up a contact form, click on the contact element, then Edit Form. You can add or rearrange fields and customize the button text.


This is the form readers will use to contact you. To view a list of all form submissions, click the three dots on your website, then select Form Submissions, then view list.

6. Adding a Blog and Store
To create a blog, click on the three dots and select Blog. Start with sample posts or create a new one.
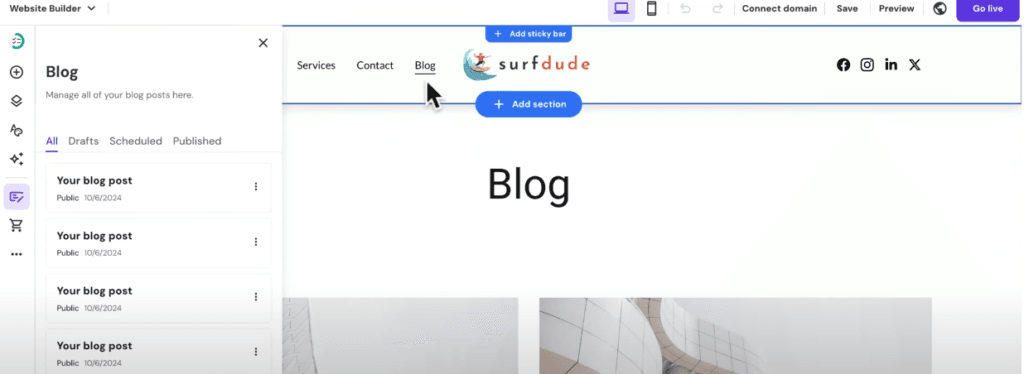
You can use AI to write the blog post for you.

Change the status from draft to public when you’re ready to publish the blog.

Adding an eCommerce Store
For adding an eCommerce store, click on the shopping cart icon, and follow prompts to set up products and payment methods.
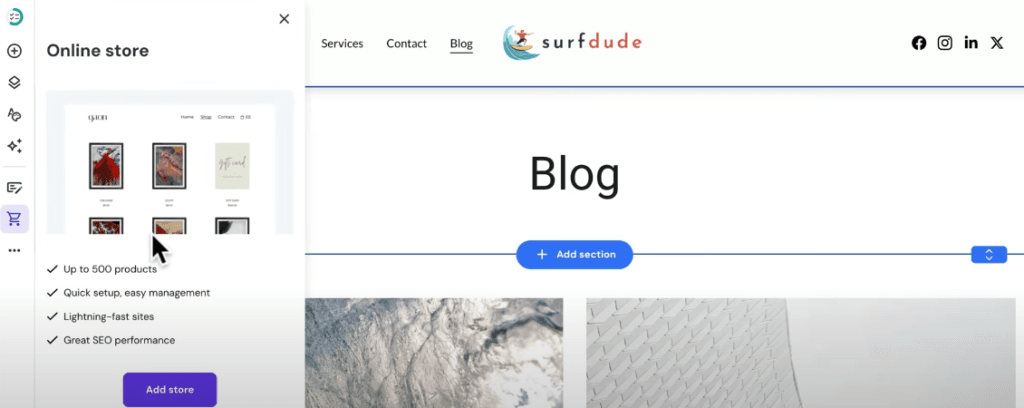
To add your own products, click on the shopping cart icon and then select “Manage Store.” Then setup your store country and currency.

7. SEO Settings
Before publishing, optimize your site for search engines:
1. Upload your logo as a favicon: Go to the three dots, select General Settings, and under Favicon, upload a square logo of your brand.

2. Add a link preview image (1200×630 pixels) then save changes.

3. Configure SEO settings for each page. To do this, navigate to the applicable page and generate SEO information. Add a title and description that reflects the page content.


Describe the content of your page, then click next step.

Then choose three main key words related to that page. Click on next step then finish.

Hostinger AI will generate an SEO title and meta description for you. This will determine how your page appears in Google search results. Now, go ahead and do the same for all other pages. (Store, Blog, Contact, Home, Services, Portfolio)

8. Setting Up Professional Email
To set up your new business email:
- Go to Website Builder then Website Manager

2. Click main menu then Emails.

3. Choose your domain and create an email address.
Then setup free email service.

Then, choose the free plan and the email you want to create.

You can access your email through the browser or a recommended app, like Gmail.

Conclusion
Now you have all the tools you need to create your first website with Hostinger. Whether you’re a blogger, a photographer, a business owner, or just want a personal space online, this platform simplifies the entire process.
Happy building!
